How to Make a Natural Floor Wax at Home
Are you weary of relying on harsh chemicals to achieve that gleaming finish on your floors? Crafting your own natural floor wax presents a safe, eco-friendly alternative that not only elevates the aesthetic appeal of your surfaces but also safeguards your family s health. With homemade floor wax, you can ensure a more personalized and chemical-free floor polishing experience.
This guide will illuminate the numerous benefits of natural floor wax, outline the essential ingredients you’ll need, and provide a straightforward, step-by-step process for creating it in the comfort of your home. From cleaning ingredients like vinegar and oil polish to the use of a double boiler for wax melting, we cover it all!
Moreover, you ll find expert tips on application and maintenance, ensuring your floors remain in pristine condition for years to come! Expect detailed advice on cleaning hardwood floors, restoring shine, and even waxing intervals to keep your floors looking their best.
Contents
- Key Takeaways:
- Why Use Natural Floor Wax?
- What are the Benefits of Making Your Own Floor Wax?
- What Ingredients are Needed to Make Natural Floor Wax?
- How to Make Natural Floor Wax at Home?
- How to Apply Natural Floor Wax?
- Essential Tips for Maintaining Your Natural Floor Wax
- Frequently Asked Questions
- What are the benefits of using a natural floor wax at home?
- What ingredients do I need to make a natural floor wax at home?
- How do I make a natural floor wax at home?
- Can I use a natural floor wax on all types of flooring?
- How often should I apply a natural floor wax to my floors?
- Can I make a scented natural floor wax?
Key Takeaways:
Why Use Natural Floor Wax?
Using natural floor wax presents a host of benefits for preserving the elegance and durability of your hardwood floors. These natural wax products, made from ingredients like beeswax and carnauba wax, serve as safer alternatives to synthetic options, delivering vital conditioning and protection for your wood surfaces.
They often feature organic components like olive oil and essential oils like lavender and lemon, ensuring your space not only smells delightful but also remains free from toxic cleaning agents. By opting for natural floor wax, you elevate the beauty of your floors while fostering a healthier indoor environment, devoid of harsh chemicals.
What are the Benefits of Making Your Own Floor Wax?
Creating your own floor wax offers a wealth of benefits that elevate the beauty of your hardwood floors while fostering a healthier home environment. Typically made from natural ingredients like beeswax, carnauba wax, and olive oil, homemade floor wax provides a safe and effective solution for wood care.
This DIY approach allows you to personalize scents with essential oils like lavender essential oil and lemon essential oil, making your home smell delightful while also being more cost-effective than those store-bought options.
Moreover, by crafting your own floor wax, you can significantly reduce your exposure to harmful chemicals commonly found in commercial products, aligning your practices with eco-friendly principles.
What Ingredients are Needed to Make Natural Floor Wax?
To craft an effective natural floor wax, gather a few essential ingredients that not only clean but also nourish and protect your hardwood floors. Key components like beeswax and carnauba wax deliver a durable, glossy finish, while olive oil serves as a conditioner, enhancing the wood’s natural beauty.
You might consider adding essential oils such as lavender and lemon for a delightful scent; after all, who doesn t love a fresh aroma wafting through their home? Additionally, d-limonene, derived from citrus peels, can boost the cleaning properties of your homemade wax.
Together, these natural ingredients create an eco-friendly and effective solution for maintaining your floors.
1. Beeswax
Beeswax is an essential ingredient in creating natural floor wax, thanks to its remarkable properties that provide both protection and shine to your hardwood floors. This natural substance not only seals and protects wood surfaces from moisture but also enhances their appearance, giving them that beautiful luster you’ve always wanted.
Its conditioning qualities make it an ideal choice for keeping your floors in good shape, ensuring your floors remain in excellent condition for years to come.
When you incorporate beeswax into your homemade formulations, it forms a layer that keeps dirt and moisture out and effectively repels dirt and dust, making maintenance incredibly easy. It nourishes the wood, preventing it from drying out and cracking a crucial step in avoiding long-term damage.
Best of all, this eco-friendly option is free from harsh chemicals perfect for your family! The natural scent of beeswax adds a pleasant aroma to the experience of application, promoting a sense of warmth throughout your living space.
For those who appreciate both aesthetics and functionality in wood care, beeswax proves to be a critical ally in your DIY floor preservation efforts. Pair it with a microfiber cloth for the best results in polishing wood.
2. Carnauba Wax
Carnauba wax, sourced from the leaves of the Brazilian palm tree, is a key player in natural floor wax formulations, celebrated for its remarkable hardness and high-gloss finish. Often dubbed the ‘queen of waxes,’ carnauba wax not only imparts a stunning shine to your hardwood floors but also establishes a durable protective barrier against scratches and wear.
Its compatibility with other natural ingredients makes it a favored choice for those who prefer crafting their own wood care recipes. This ensures your floors retain their elegance and longevity over time.
Carnauba wax can also be an excellent addition to your furniture polish and homemade cleaning recipes. This exceptional wax possesses impressive water-resistant properties, serving as a shield against spills and moisture that can lead to damage in the long run.
When incorporated into natural floor wax products, carnauba significantly elevates performance by delivering not just brilliance but also a long-lasting protective layer that reinforces the integrity of wood surfaces. Try adding carnauba wax to your cleaning routine and watch your floors transform!
For anyone serious about floor maintenance, adding carnauba wax to your cleaning regimen can work wonders, transforming dull and aging hardwood into a vibrant and resilient masterpiece. Plus, its eco-friendly nature means that while you’re achieving a breathtaking finish, you’re also championing practices that are gentle on the environment.
3. Olive Oil
Olive oil is a vital conditioning agent in natural floor wax, bringing a wealth of benefits to the health and appearance of your hardwood floors. Its innate moisturizing qualities help prevent the wood from drying out and cracking, ensuring your flooring enjoys a longer lifespan.
When you incorporate olive oil into your homemade wood floor cleaner and wax recipes, it not only enhances the finish but also adds a subtle sheen, giving your floors a polished look without relying on harsh chemicals.
By blending olive oil into your formulation, you create a protective barrier that safeguards against dirt and grime while nourishing the wood fibers. This olive oil mixture can also be used as a furniture care solution, offering multiple benefits.
This nurturing effect naturally rejuvenates the surface, making scratches less visible and restoring the floor’s original luster. Olive oil has antibacterial properties that help create a healthier indoor environment by helping to eliminate harmful microbes.
This simple ingredient shows that keeping your wooden floors beautiful can be easy! Maintaining beautiful wooden floors doesn’t require complicated solutions; rather, a few natural components can deliver remarkable results.
4. Essential Oils
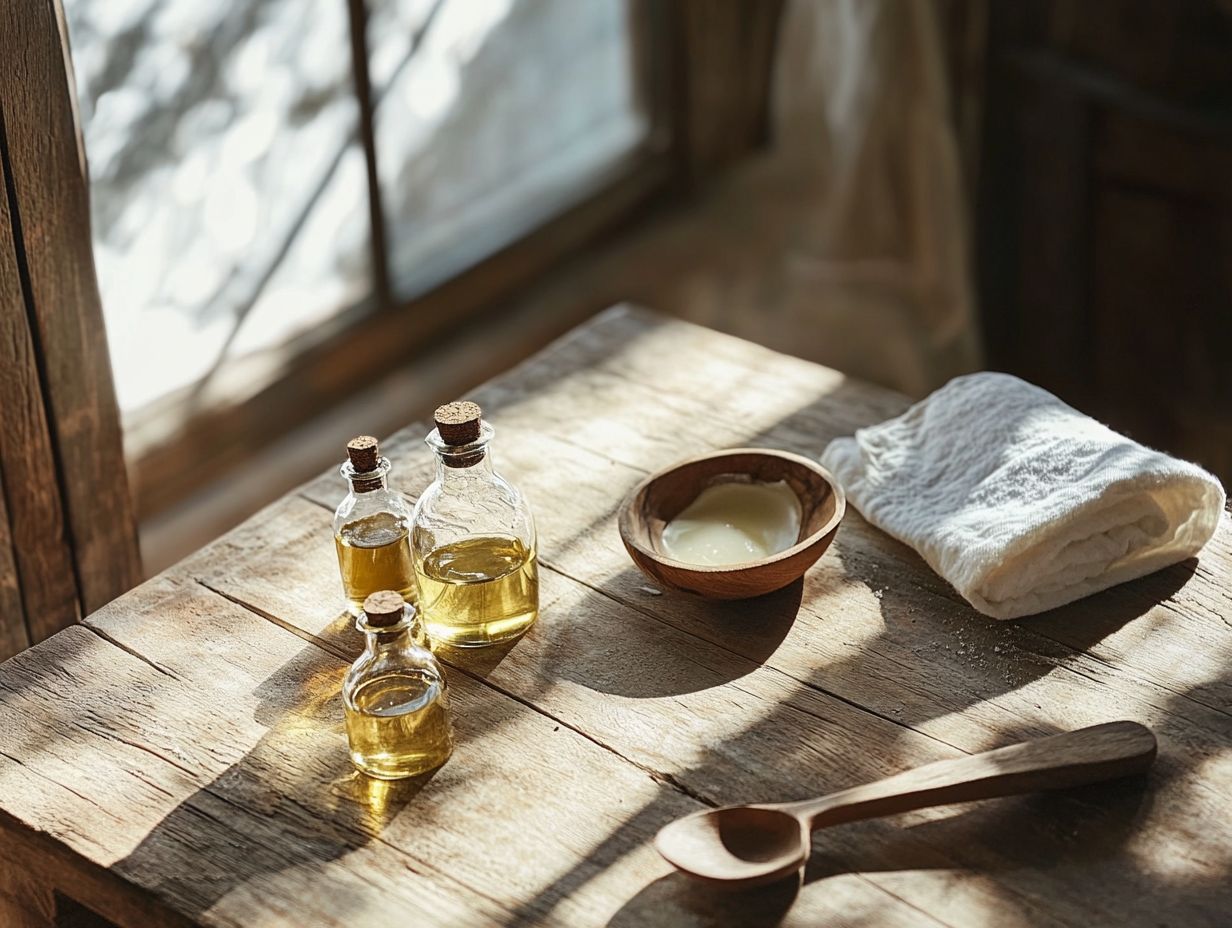
Essential oils are important in enhancing the fragrance and overall effectiveness of natural floor wax formulations. Oils like lavender and lemon not only introduce delightful aromas but also have natural antibacterial properties, making them great choices for keeping a clean and fresh ambiance.
D-limonene, derived from citrus peels, is well-known for its cleaning power and can significantly improve the effectiveness of your homemade floor wax, ensuring your hardwood floors remain stunning and hygienic. Incorporate it into your DIY cleaning projects for a complete cleaning solution.
Oils like tea tree and eucalyptus can be added to your natural floor wax recipes, offering extra antimicrobial benefits to fight germs and keep surfaces spotless. The refreshing scent of peppermint can energize the atmosphere while boosting the cleaning formula s effectiveness.
By using these essential oils in your DIY cleaning projects, you’ll love discovering a safer, eco-friendly alternative to commercial products, all while enjoying a variety of pleasant fragrances. These essential oil blends not only smell amazing but also contribute to a healthier home environment.
With the right combination of oils, you can easily create a tailored floor care solution that not only cleans but also revitalizes your living space.
How to Make Natural Floor Wax at Home?
Making natural floor wax at home is a simple and satisfying task, allowing you to create a safe and effective solution for maintaining your hardwood floors. Whether you are waxing hardwood or wood laminate, this homemade approach ensures a customized and safe cleaning method.
By using ingredients like beeswax, carnauba wax, olive oil, and essential oils, you can make a blend that not only protects but also enhances the beauty of your wood surfaces.
This DIY approach gives you complete control over what goes into your wax and aligns perfectly with eco-friendly practices, making it an ideal choice for homeowners who value both effectiveness and sustainability in floor maintenance.
1. Grate the Beeswax and Carnauba Wax
The first step in making your own natural floor wax is to grate the beeswax and carnauba wax into fine pieces. This ensures they melt evenly during the heating process. Using a double boiler can help achieve the perfect consistency for your floor wax.
This preparation is essential for faster and more efficient melting, resulting in a smooth and cohesive wax mixture. Using a grater or a food processor will allow you to easily prepare these important components, laying the groundwork for your homemade floor wax.
Grating the waxes, such as beeswax and carnauba wax, not only speeds up the melting process but also enhances the blending of ingredients, ultimately leading to a superior finish for your floors. For the best results, choose a box grater with fine holes or use a food processor to save time and effort.
It s wise to work in a well-ventilated area, as the heat may release strong scents. Make sure your workspace is tidy and that you have all your tools ready like double boilers and stirring utensils so you can easily combine the components of your natural floor wax without a hitch. Gather your ingredients and tools from your kitchen pantry to ensure everything is easily accessible.
Give it a try today and transform your cleaning routine!
2. Melt the Waxes in a Double Boiler
Next, you ll want to melt the grated beeswax and carnauba wax in a double boiler, which is a pot that uses steam to gently heat another pot placed on top. This method provides a gentle and controlled heat source, ensuring you don t accidentally burn the waxes. By doing this, you guarantee that the wax melts evenly while preserving the integrity of the natural ingredients, leading to a high-quality homemade floor wax. Pay close attention to the melting process, stirring occasionally to achieve a smooth consistency that sets the stage for your successful DIY floor cleaner. Consider adding other natural ingredients like olive oil to enhance the mixture s conditioning properties.
- Start by filling the bottom pot of the double boiler with water, ensuring it doesn t touch the top pot when placed on top.
- Heat the water over a medium flame, gradually increasing the temperature while keeping a watchful eye on the process.
- As the waxes begin to melt, gently stir with a wooden spoon or silicone spatula to ensure even heat distribution.
- Maintain a steady temperature of around 160 F to 180 F to help prevent scorching.
- As the waxes liquefy, be attentive to the texture, stirring consistently until a velvety consistency forms this is crucial for creating an effective and smooth DIY floor cleaner.
3. Add Olive Oil and Essential Oils
Once the waxes have fully melted, it s your moment to elevate the mixture by adding olive oil and your choice of essential oils, such as lavender or lemon essential oil. This not only enhances the conditioning properties but also adds a nice scent to your floor wax. The olive oil will nourish the wood, while essential oils like lavender or lemon will provide both a pleasant aroma and additional cleaning benefits.
Be sure to stir the mixture thoroughly, ensuring that all ingredients are evenly distributed. This creates a cohesive and effective solution for your hardwood floors.
Incorporating olive oil allows for deeper penetration into the wood fibers, improving moisture retention. It also adds a subtle sheen that beautifully highlights the floor s natural grain. The essential oils lend delightful scents and boast antibacterial properties that aid in cleaning, making them a superb choice for your DIY floor cleaner.
To integrate these oils properly, measure out your desired amounts and blend them gradually into the melted wax. This careful mixing will ensure a high-quality treatment that revitalizes and protects your wooden surfaces. The olive oil mixture conditions the wood while the essential oils provide antibacterial properties.
4. Pour the Mixture into a Container
Once your mixture is perfectly combined, it s time to pour it into a clean, dry container for storage. Now, watch your mixture cool and solidify into your very own natural floor wax!
Choosing the right container is crucial; it will shield your homemade solution from contaminants while providing you with easy access when you need it. Opt for a glass jar or a plastic container with a secure lid to preserve the quality of your natural floor wax for future use.
Label your container with the date and ingredients so you can track its freshness easily. Store the container in a cool, dry place, away from direct sunlight, as exposure to heat can compromise the wax’s effectiveness. Avoid using any metal containers that could react with the natural ingredients. Organize your wax and cleaning recipes in one easy-to-find spot for added convenience.
By following these proper storage practices, you’ll maintain the integrity of the wax and ensure it remains easy to apply during your next cleaning session.
How to Apply Natural Floor Wax?
Applying natural floor wax correctly is crucial for maintaining both the beauty and longevity of your hardwood floors. Begin by ensuring that the area is free of dust and debris; this step significantly enhances the effectiveness of your homemade polish.
Take a microfiber cloth and apply the wax in thin, even layers, allowing each coat to dry fully before proceeding with additional layers. This careful method creates a smooth finish and builds a strong protective layer for your floors. Regular floor maintenance is key to preserving the wax s effectiveness and the floor s aesthetic appeal.
1. Clean the Floor Thoroughly Before Waxing
Before you apply natural floor wax, it s essential to give your floor a thorough cleaning. This ensures that the wax adheres properly and delivers that optimal shine you desire. Start by sweeping or vacuuming the area to remove loose dirt and debris. Then mop with a natural cleaning solution to tackle any stubborn stains. This step is vital in hardwood floor care, as it prepares the surface for an even wax application, enhancing its protective qualities.
Taking the time to clean effectively prevents dust and grime from getting trapped under the wax. This could lead to an uneven finish. For the best results, consider using a microfiber mop; it’s gentle yet highly effective at lifting dirt without scratching the wood. When mopping, be mindful to avoid excess water, as too much moisture can warp your hardwood over time. A vinegar and oil polish also works well for cleaning hardwood floors before waxing.
Opt for a cleaner that won t harm your wood to help maintain the floor’s integrity while prepping it for waxing.
This meticulous approach not only cleans your floor but also prolongs its life, allowing you to savor its natural beauty for many years to come.
2. Apply the Wax in Thin Layers
When you apply natural floor wax, it’s crucial to do so in thin, even layers to achieve a smooth, polished finish without any buildup. Begin by dipping a microfiber cloth into the wax. Gently rub it onto the floor in a circular motion, tackling a small area at a time. Using this method helps the wax soak in better, giving your floors that stunning shine!
To elevate your results, remember to work in manageable sections. Allow each layer to dry completely before moving on to the next. This patience not only prevents unevenness but also encourages deeper penetration of the wax, enhancing the overall durability of the finish. Consistent polishing of floors will ensure they maintain their elegance and protection.
For the best outcome, ensure that your working environment is free of dust and debris, as these can interfere with a smooth application. A gentle touch, paired with a consistent technique, will create an elegant surface that showcases the beauty of your wood flooring while preserving its integrity.
3. Buff the Floor
Buffing the floor after applying natural floor wax is an essential step that truly elevates the shine. It creates a smooth finish on your hardwood floors. This process is a key part of your waxing routine, as it helps seal the wax and prolong its durability.
In terms of proper techniques, you have options. You can choose from manual buffers to electric ones, depending on the size of the area you’re treating. For the best results, it’s wise to work in small sections, making sure every inch gets the attention it deserves. If you prefer a hands-on approach, using a clean microfiber cloth can be particularly advantageous; it allows for deeper penetration into those grooves and crevices.
The final result not only enhances the visual appeal of your polished floors but also fortifies them against daily wear. This ensures they maintain their charm and longevity for years to come.
Essential Tips for Maintaining Your Natural Floor Wax
Maintaining your natural floor wax is essential for ensuring your hardwood floors remain in pristine condition. This helps safeguard against wear over time. By committing to regular cleaning and adopting gentle maintenance practices, you can extend the life of your homemade wax while preserving the shine and beauty of your wood floors.
Utilizing effective cleaning tips such as opting for natural cleaning products and determining the ideal waxing intervals will allow you to keep your floors looking their best with minimal effort. Don’t wait too long to maintain that shine!
1. Clean Regularly and Effectively
Regular cleaning is vital for maintaining the look and quality of your natural floor wax, ensuring that dirt and debris don t accumulate on your hardwood floors. Having a weekly cleaning routine is important. Start by sweeping or vacuuming to eliminate loose particles. Then follow up with a gentle natural cleaning solution that works well with your wax. By cleaning regularly, you keep your floors looking great and protect their finish.
Incorporating the right natural cleaning products into your maintenance strategy is essential. Seek out options specifically formulated for hardwood floors that are free from harsh chemicals. Always check the labels to confirm that the ingredients adhere to eco-friendly practices, ensuring the safety of your family and the environment. If you’re interested in homemade solutions, exploring cleaning hacks and wood care recipes can offer additional benefits and convenience.
Using a microfiber mop or a microfiber cloth is a smart choice, as it effectively captures dirt without risking scratches on the surface. To further protect the natural floor wax, consider periodic treatments with specialized wood conditioners special products that help nourish and protect the wood or conditioning wax that rejuvenates the finish, making your floors resilient against everyday wear and tear. Incorporating wood care recipes into your routine can also enhance the durability of your floors.
This comprehensive strategy not only fosters a clean and inviting atmosphere in your home but also reflects your commitment to quality care for your hardwood floors. Regular floor maintenance and the use of eco-friendly products further demonstrate this dedication.
2. Reapply Wax as Needed
Waxing your hardwood floors using natural ingredients like beeswax and carnauba wax gives a beautiful finish.
To keep your hardwood floors looking their absolute best, it’s essential to reapply natural floor wax periodically, adjusting based on the foot traffic and wear they endure. By establishing appropriate waxing intervals, you ll maintain a protective layer that enhances both the shine and longevity of your floors. This can be supported by other floor maintenance tips, such as using DIY floor cleaners made from natural ingredients like vinegar and oil polish.
As a general rule, consider reapplying wax every three to six months, or whenever you notice a dull appearance. This helps you keep your floors looking their best at all times. Incorporating weekly cleaning and using safe cleaning products can also help maintain the floors.
To accurately assess when it s time to reapply the wax, make it a habit to observe the surface condition regularly. Look for signs of wear, such as scratches or fading, and factor in how often you host gatherings or events that might increase foot traffic. A natural wax application can help restore shine and protect your wood floors.
Regular sweeping and mopping can significantly prolong the life of the wax, allowing you to stretch out the intervals between applications. Incorporating floor maintenance tips, like placing mats in high-traffic areas, can help reduce wear and preserve the aesthetic appeal of your hardwood. Consider using a homemade wood floor cleaner made from ingredients found in your kitchen pantry.
Keeping track of when you last waxed your floors can also be a game-changer, enabling you to set reminders that help maintain their pristine finish. Tools like a wax application schedule can further aid in this process.
3. Avoid Using Harsh Chemicals
Adopting homemade cleaning recipes can be a great alternative to harsh chemicals.
To preserve the quality and longevity of your natural floor wax, it’s essential to avoid harsh chemicals and abrasive cleaning agents that could damage the finish of your hardwood floors. Instead, choose natural cleaning products that are both gentle and effective, such as homemade solutions using ingredients like vinegar and essential oils. This ensures your floors are protected while showcasing their inherent beauty.
This approach not only aligns with eco-friendly practices but also fosters a healthier home environment. It enhances the effectiveness of your floor maintenance routine. Using natural cleaning products like olive oil or lemon essential oil supports this goal.
By adopting this mindset, you can significantly boost the durability of your hardwood floors. Many homeowners overlook that using the wrong cleaning supplies can lead to dulled surfaces and stripped finishes, ultimately resulting in costly repairs or the need for re-waxing. Gentle cleaners help maintain that pristine, glossy appearance while preventing the degradation of protective surfaces over time. Incorporating eco-friendly polish and cleaning tips from experts like Wendyl Nissen can also be beneficial.
It s crucial to read labels carefully and select products specifically formulated for hardwood floor care and maintenance of floor wax. This simple step can save you both time and money, ensuring that your investment in beautiful flooring is safeguarded well into the future. Using essential oil blends or following recipes for natural floor wax can also improve your floor care routine.
Frequently Asked Questions
What are the benefits of using a natural floor wax at home?
Using a natural floor wax at home is beneficial for both your health and the environment. Unlike conventional floor waxes that contain harmful chemicals, natural floor wax is non-toxic and eco-friendly. It also provides a longer-lasting and more durable finish for your floors.
What ingredients do I need to make a natural floor wax at home?
Common ingredients to make a natural floor wax at home include beeswax, olive oil, and essential oils for fragrance. You can also add vinegar or lemon juice for added cleaning power. For a scented wax, consider using lavender essential oil or lemon essential oil. Ingredients like lemon balm can also be incorporated for added benefits.
How do I make a natural floor wax at home?
New Zealand’s organic food industry often influences many recipes, including those for natural floor wax. To make a natural floor wax at home, start by melting beeswax in a double boiler. Once melted, add olive oil and any desired essential oils. Stir until well combined, then pour the mixture into a container to cool and solidify. Your natural floor wax is ready to use! You can also create a vinegar and oil polish for quick touch-ups.
Can I use a natural floor wax on all types of flooring?
Yes, a natural floor wax can be used on most types of flooring, including wood, tile, and linoleum. Just be sure to test a small area first to ensure that the wax does not cause any damage or discoloration. This includes options like wood laminate, which can also benefit from these natural solutions.
How often should I apply a natural floor wax to my floors?
It is recommended to apply a natural floor wax every 3-6 months, depending on the amount of foot traffic in your home. This will help maintain the shine and protection of your floors.
Can I make a scented natural floor wax?
Yes, you can add essential oils to your natural floor wax for a pleasant scent. Some popular options include lavender, lemon, and peppermint. Just be sure to use high-quality, pure essential oils for the best results.
Try making your own natural floor wax today!

